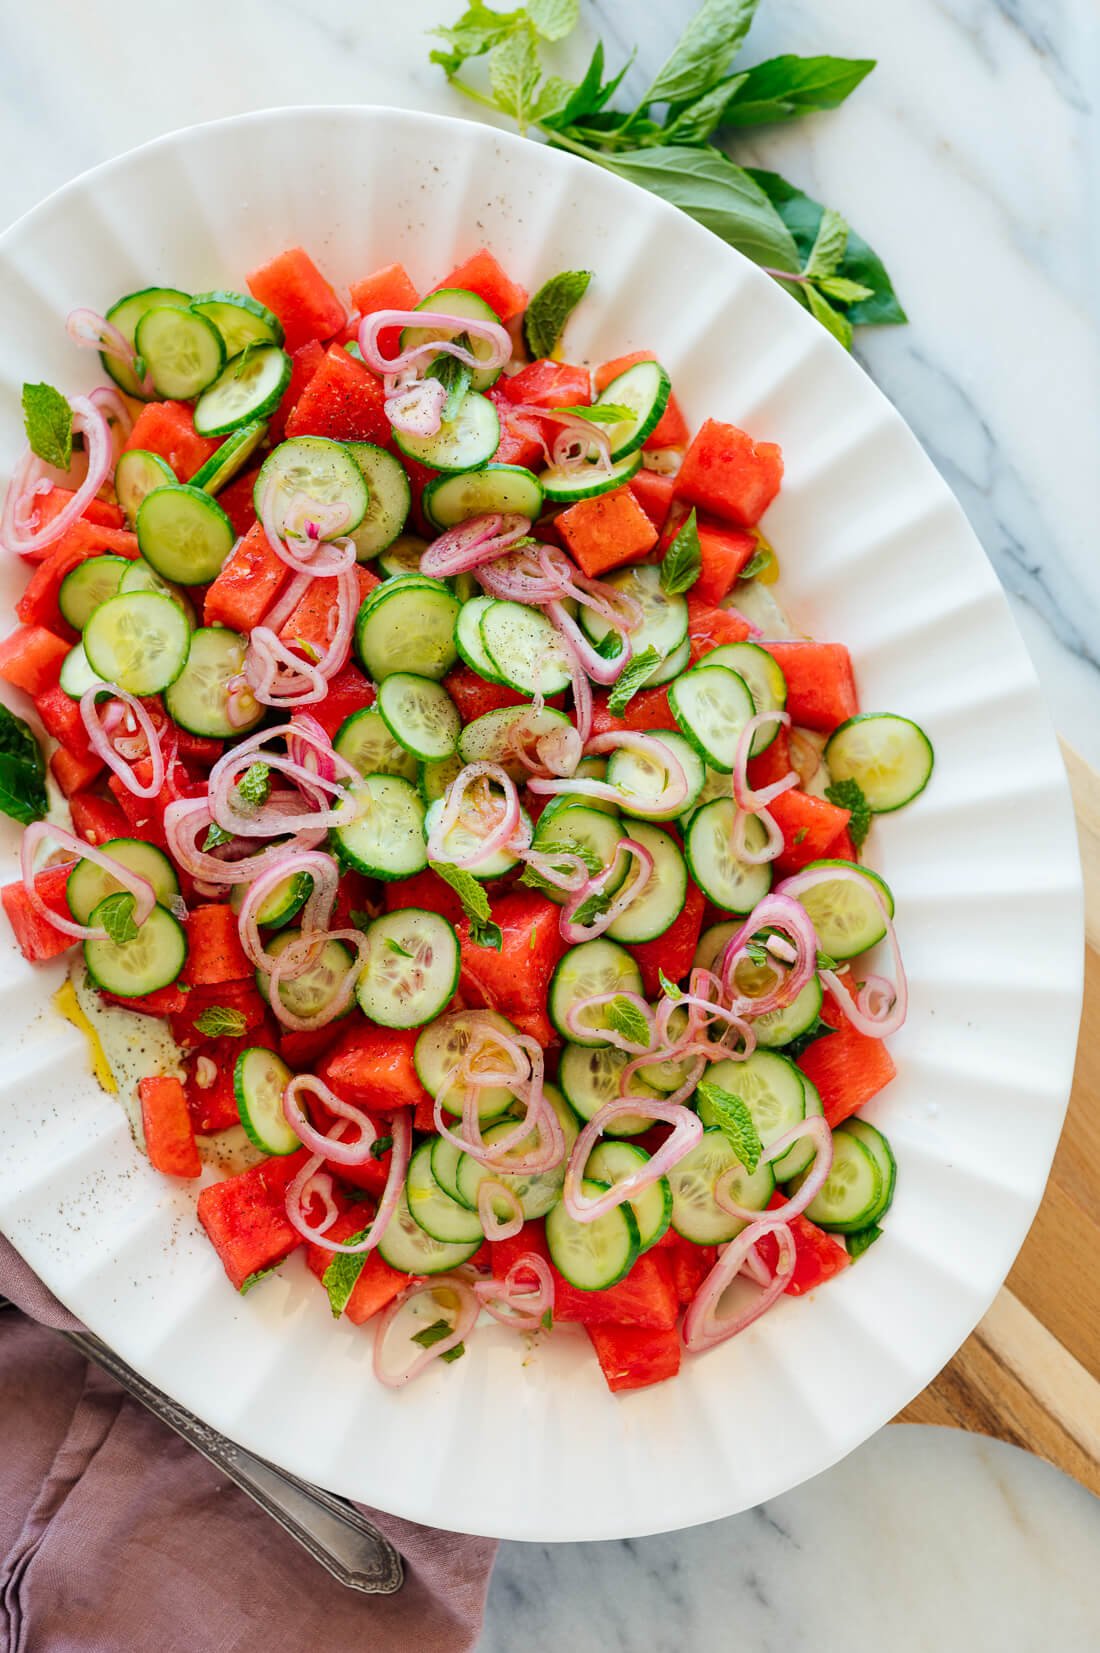
This recipe’s title doesn’t do this beauty justice. Look at it! This watermelon salad recipe is a showstopper, if I can say so myself.
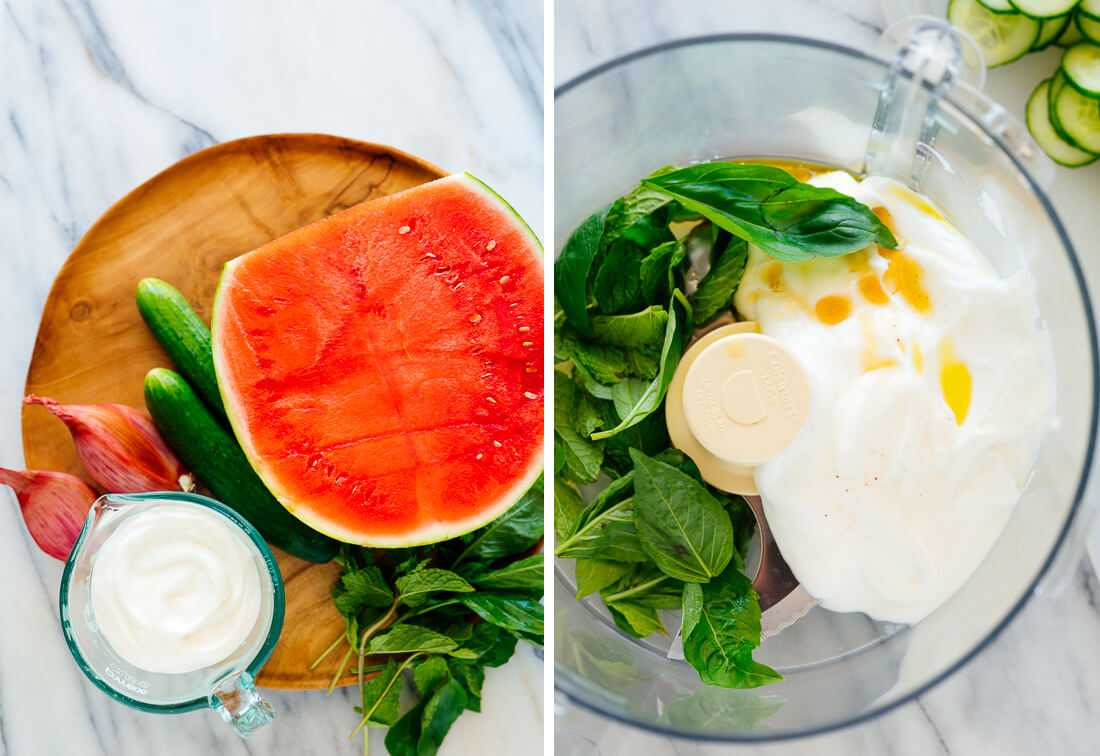
This salad starts with a base of cold, creamy herbed yogurt sauce. Then, we top it with cubed ripe watermelon, followed by crisp cucumber, lightly pickled shallot, and more fresh basil and mint.
Each element is so simple to prepare, and the end result is spectacular.
Watermelon is perfectly red and juicy this time of year, so please make this salad while you still can. It would be the perfect salad to bring to your weekend get-together.
This salad is best consumed within a couple hours of assembly. I bet your friends will be up for the challenge! Got your watermelon yet?
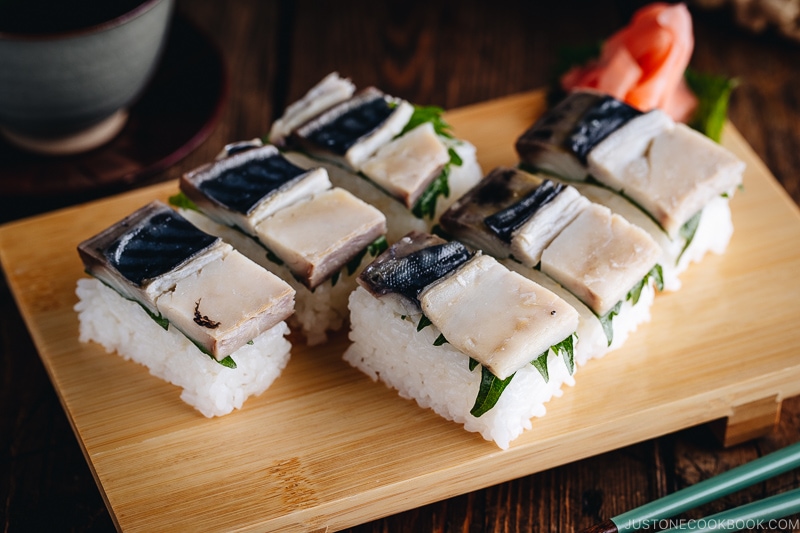
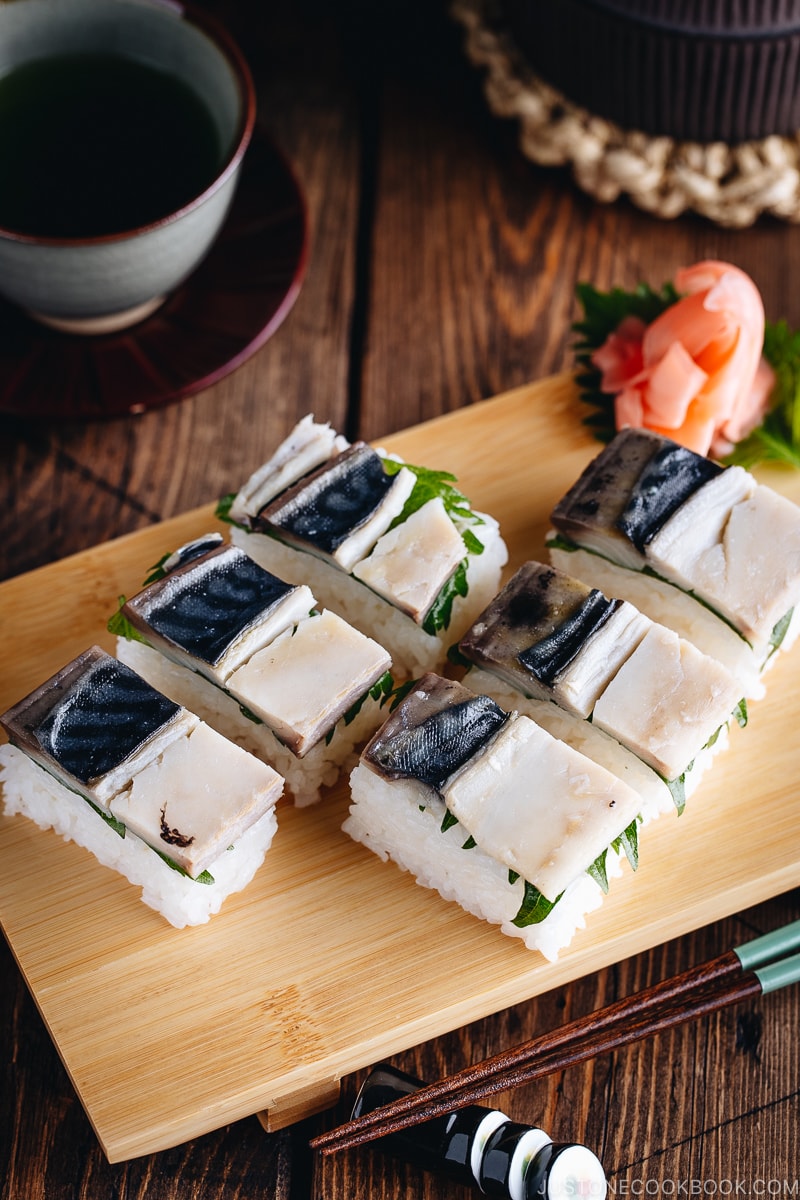
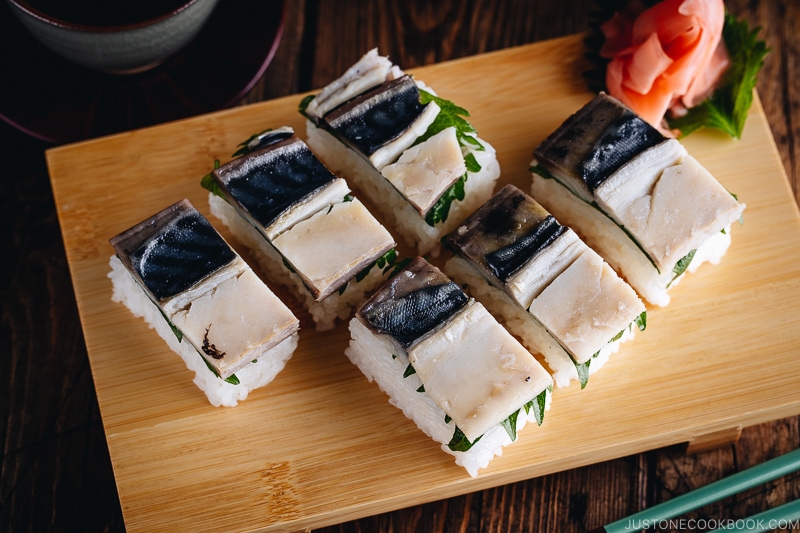
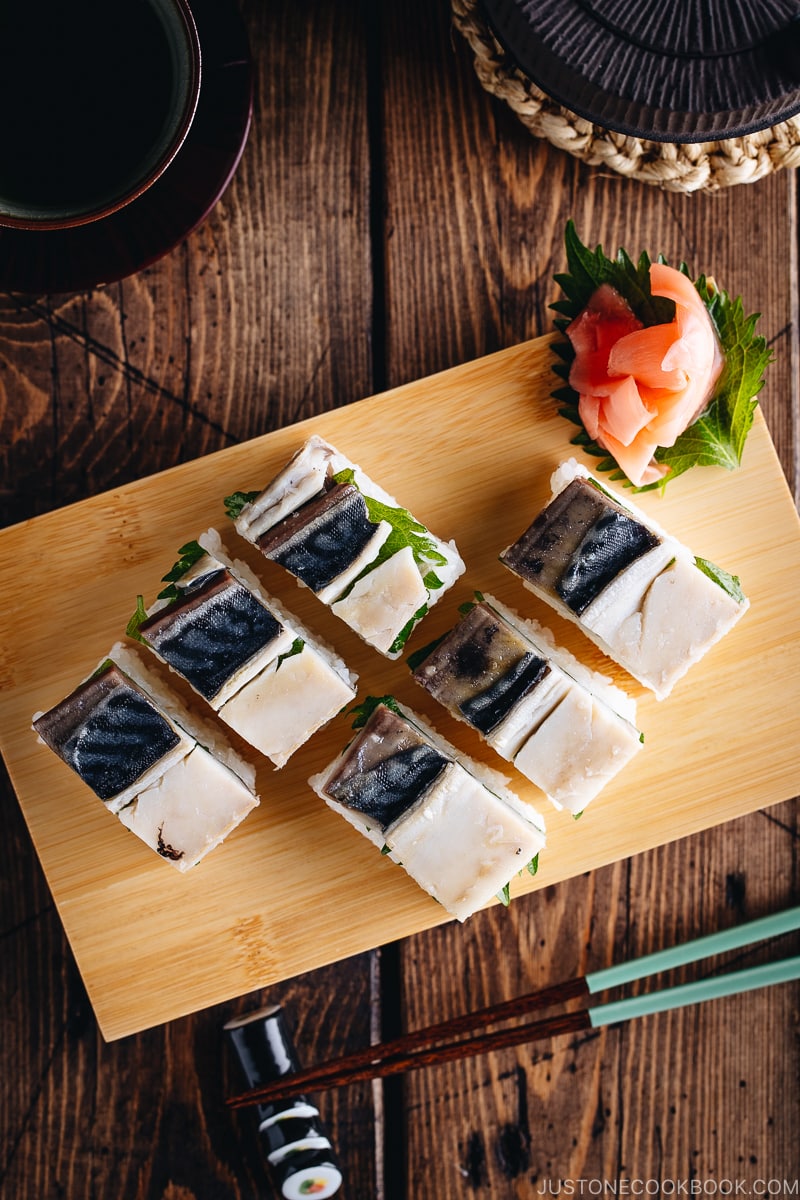
Impress your family and friends by learning how to make unique, delicious and beautiful Pressed Sushi (Oshizushi).This Mackerel Pressed Sushi is made of three layers: an aburi-style mackerel, shiso, and sushi rice.
Today I’ll introduce another popular variety, Pressed Sushi or Oshizushi (押し寿司). Among this type of sushi, the most popular one is Mackerel Pressed Sushi or Saba Oshizushi (鯖の押し寿司), so let’s make it today!
What is Pressed Sushi (Oshizushi)?
Pressed Sushi or Oshizushi is made from layers of cured fish and sushi rice that are placed in a special box called Oshibako (押し箱), and then compressed together by weight, making them into a tightly pack sushi stack. Mackerel Pressed Sushi consists of vinegar cured mackerel, shiso leaves, and sushi rice.
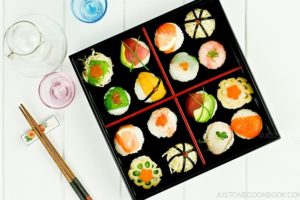
You may have seen fancier pressed sushi with multiple layers of sushi rice, seafood, and other ingredients. Oshibako creates a perfectly rectangular shape, and if you are ambitious, you can make eye-catching pressed sushi with a checkered pattern using colorful toppings (maybe someday for me!).
Is Battera same as Mackerel Pressed Sushi?
For those of you from Osaka or have traveled to Osaka, you may have heard of Battera (バッテラ) – a type of pressed sushi made with vinegar pickled mackerel. A fillet of mackerel is also placed inside the wooden box and filled with sushi rice. The difference is that after you remove the sushi out of the box, a super-thin, almost translucent sheet of kombu is placed on top of the mackerel before it’s cut and served. The addition of kombu is unique to the regional Osaka cuisine.
The name “Battera” doesn’t sound so Japanese, does it? That’s because the name derived from the Portuguese word bateria or “small boat” as the sushi made with the original method without the box looked very similar to a small ship from the side.
Watch How to Make Mackerel Pressed Sushi
Impress your family and friends by learning how to make unique, delicious and beautiful Pressed Sushi (Oshizushi).
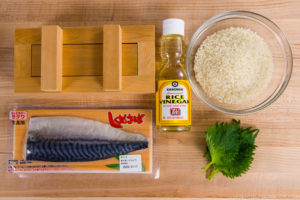
What You Will Need:
1. Sushi Rice
If you want to learn how to make sushi rice properly from scratch, this is the recipe with a video tutorial.
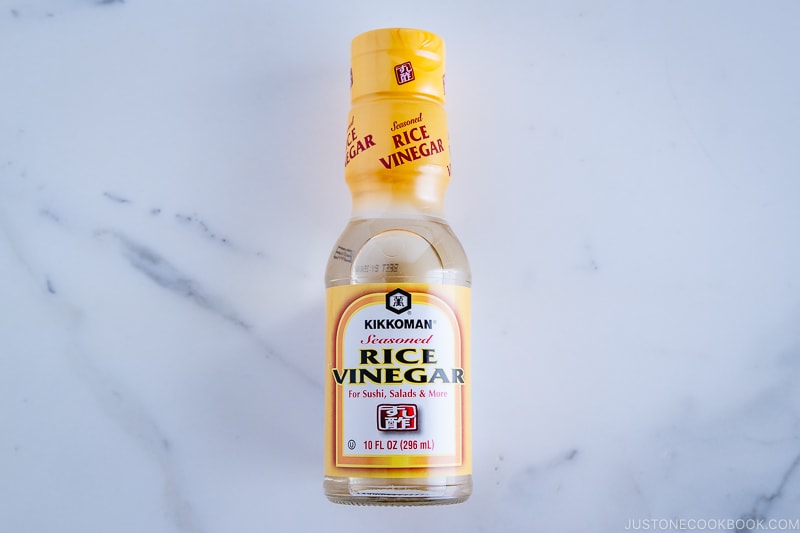
However, today I’ll show you something new. Did you know you can find two types of rice vinegar when you go to Japanese condiment isle? The first type is regular rice vinegar and the other one is “seasoned” rice vinegar. The one labeled as ‘Seasoned’ rice vinegar is basically sushi vinegar, specifically made to quickly prepare sushi rice!
When Japanese people talk about “Sushi Rice”, we’re referring to steamed rice seasoned with sushi vinegar called sushizu (すし酢).
Sushizu or sushi vinegar is made of rice vinegar, sugar, and salt. It’s pretty simple, but when you’re in a hurry, it’s really convenient to just reach for the ready-for-use sushi vinegar instead of whisking your own.
Today I use Kikkoman Seasoned Rice Vinegar to make delicious sushi rice for this Mackerel Pressed Sushi recipe.
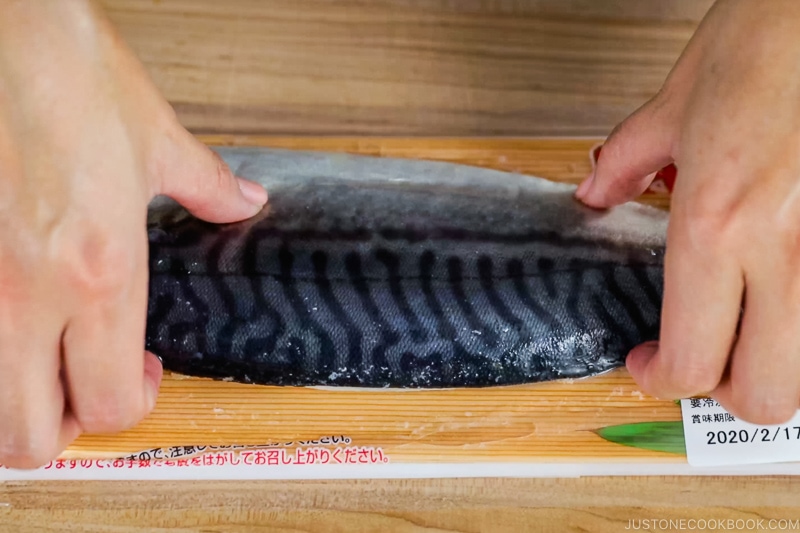
2. Vinegar Pickled Mackerel (Shime Saba)
For this recipe, you will need a special type of mackerel, not a fresh one. Mackerel is known to go spoiled easily, so the best way to preserve the fish is to cure them with vinegar. Cured and marinated mackerel is called Shime Saba (しめ鯖) in Japanese. You can easily find pre-marinated and packaged Shime Saba in the frozen section of Japanese or Asian grocery stores. The same brand Shime Saba I find is a bit cheaper in the Korean grocery store than the Japanese store in my area.
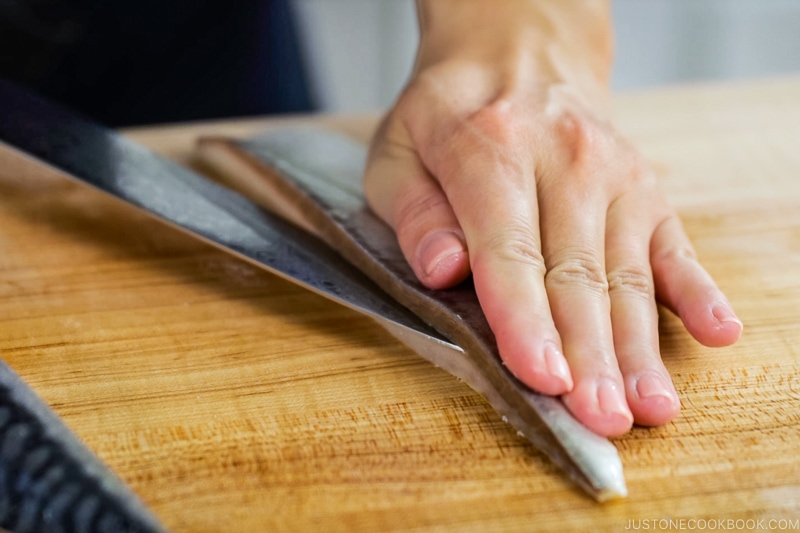
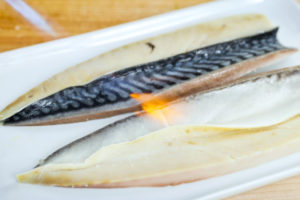
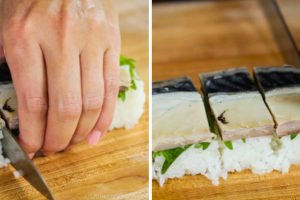
Since the mackerel fillet is uneven, being thicker in the middle and thinner toward the edge, I cut the fillet in half lengthwise and then butterfly each piece from the cut edge.
If you have a kitchen torch, I recommend searing the skin of the mackerel for an additional layer of flavors. When seared, we say Aburi Mackerel, Aburi Salmon, Aburi Toro, etc (Aburu 炙る is a verb; Aburi 炙り is a noun and adjective).
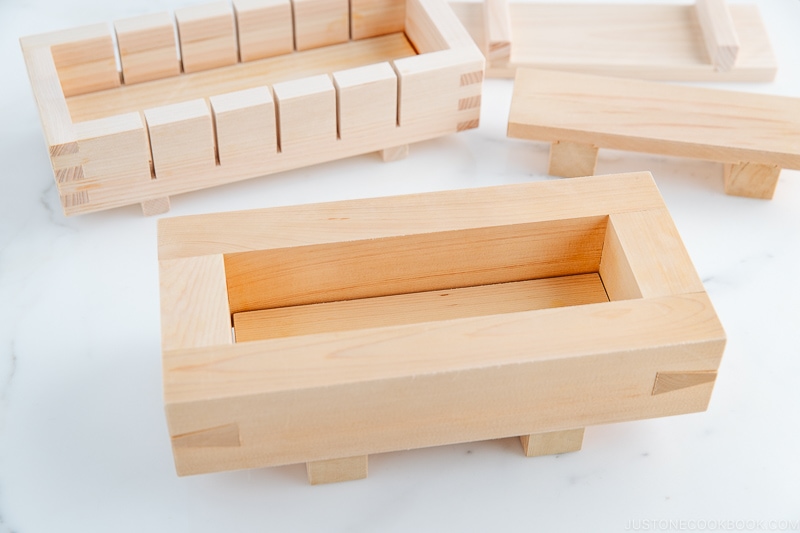
3. Oshibako (Sushi Press)
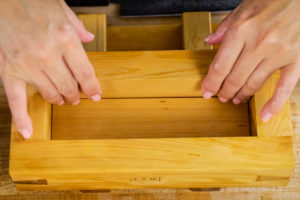
You will need an Oshibako (押し箱), or sometimes called Oshizushihako (押し寿司箱) or Hakozushigata (箱寿司型). It is a wooden box or mold, made of 3 parts: a bottom part, the rectangular walls, and a top part. The top and bottom parts resemble a traditional Japanese geta (wooden sandal).
Before you use the Oshibako, you will need to moisten the three parts so the rice will not stick to them. To assemble, you place the bottom part and then the rectangular wall part. After you place the ingredients inside, position the top part and put all your body weight down to compress the sushi. You can remove the box once you finished pressing. Wash the mold thoroughly and allow it to dry.
Do we need Oshibako to make pressed sushi?
For those of you who wish to try this recipe without using an Oshibako, you can get away with your own makeshift box. Use a rectangular/square container or bento box lined with plastic wrap so you can pull out the sushi later. You will also need something flat that fits inside the box to press down the sushi.
You can find a plastic oshibako online, but I like my oshibako made with Hinoki (Japanese cypress). It was my mom’s but I brought it back years ago. I love using traditional kitchen tools in my kitchen to keep the handicrafts alive and hopefully passing down the tradition to the next generation. You can find a similar Oshibako on Amazon.
5 Tips to Make Perfect Pressed Sushi
I put together five tips that will be helpful when you make Oshizushi. Practice definitely helps, and as you make more Oshizushi, your sushi will be neater and prettier. I can definitely spend more time improving my Oshizushi skill.
Moisten the Oshibako and hands with vinegar water (it’s called tezu).
Add the fillings evenly, and don’t miss filling the four corners!
Press using your body weight, not just the arms and hands.
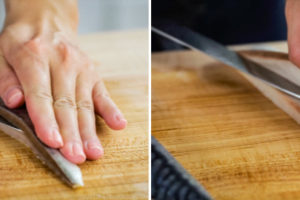
Use moistened cloth to wipe the knife every time you slice the sushi.
When you cut the sushi, the knife motion should be “push forward and pull”.
Whether your pressed sushi turn out perfect or slightly off shape, I think they will still look impressive at the dinner table. There is just a touch of elegance to the presentation when sushi is shaped this way. I’d be so thrilled to see your creation, so please share your pictures with me!
Japanese Ingredient Substitution: If you want to look for substitutes for Japanese condiments and ingredients, click here.
1 tsp salt (kosher or sea salt; use half if using table salt)
Gather all the ingredients.
To Prepare Sushi Rice
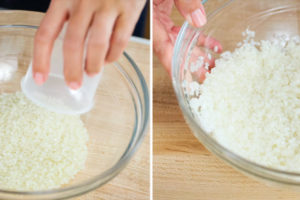
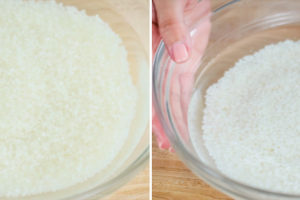
Measure the rice using a rice cooker cup and rinse under cold water by gently rubbing the rice with your fingertips in a circling motion. Submerge the rice in water and pour out the starchy water. Rinse and repeat until the water becomes clear.
Soak rice in water for 20-30 minutes.
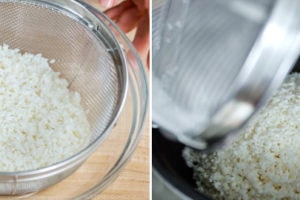
Drain water completely and set aside for 10 minutes. If you don’t have time to wait, then shake off the excess water the best you can. Transfer the rice into the rice cooker.
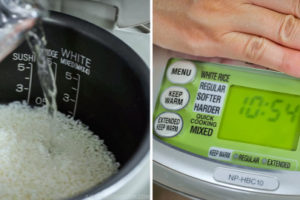
Pour water until “Sushi Rice” 2 cups (or a little bit less than regular 2 cups, if you don’t have “Sushi Rice” option) and start cooking. If you do not have a rice cooker, prepare 360 ml water (we use less water than regular rice as you will season the rice after the rice is cooked) and follow my recipe on how to cook rice in the Instant Pot or in the pot over the stove.
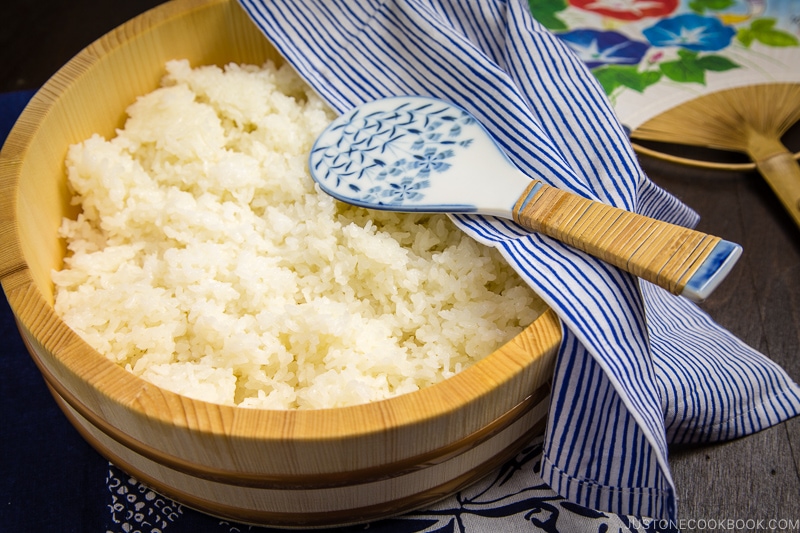
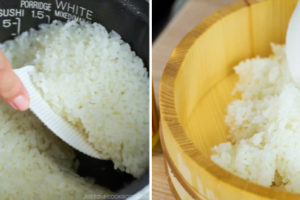
Once the rice is done cooking, fluff with a rice scooper/paddle. Moisten sushi oke/hangiri (a round, flat-bottom wooden tub) or a large bowl with water so the rice will not stick. Transfer the cooked rice into the sushi oke and spread out evenly so the rice will cool faster.
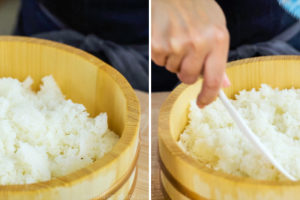
While it’s hot, mix 4 Tbsp Kikkoman® Seasoned Rice Vinegar (or homemade sushi vinegar into the rice. Add more or less to your liking. With a rice paddle, slice the rice at a 45 degree to separate the rice grains instead of mixing. Meantime, you need to use a fan to cool the rice so it will shine and doesn't get mushy.
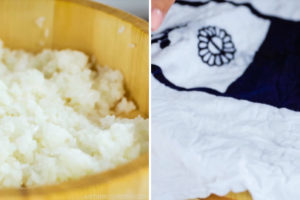
Then gently flip the rice in between slices. Repeat this process until the rice is cooled. Keep the rice covered with a damp towel (or paper towel until ready to use.
To Prepare Mackerel
Open the defrosted marinated mackerel fillet and cut the slab in half lengthwise.
Butterfly the fillet from the long edge that you just cut. Please watch the video if you need more visual. Repeat the other half.
[Optional] Place the two pieces on a ceramic plate and use a kitchen torch to lightly sear the skin for nice char flavors.
To Make Pressed Sushi
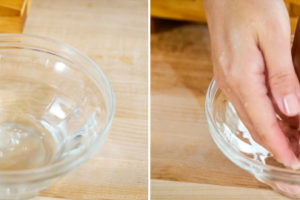
Prepare a small bowl with water and add 1 Tbsp Kikkoman® Seasoned Rice Vinegar (or rice vinegar). Moisten your hands so the rice won’t stick to them.
Assemble Oshibako mold with the bottom base and side so the top is open. Moisten it with the vinegar water so the rice won’t stick to it.
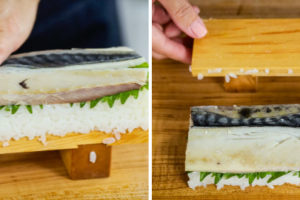
First, put the mackerel fillet at the bottom, skin side down. When the fillet is bigger than the box, cut off the excess and fill in all the voids if any.
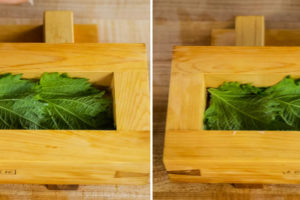
Then add shiso leaves on top of the mackerel.
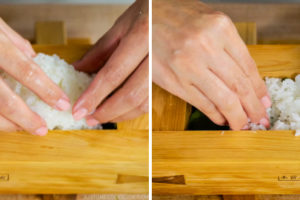
Add rice from one side to the other. Using your fingers, fill the rice right into the corners and try to keep the amount of rice even all over.
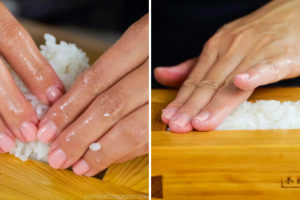
Add more rice if necessary and fill the mold just right above the rim.
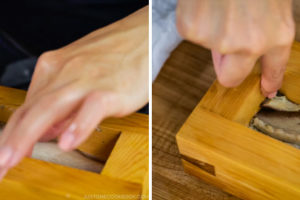
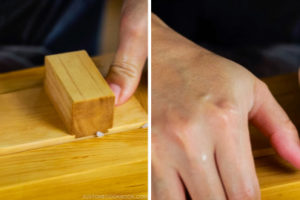
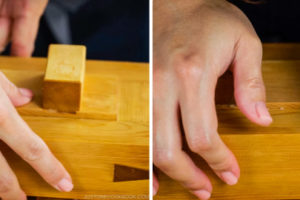
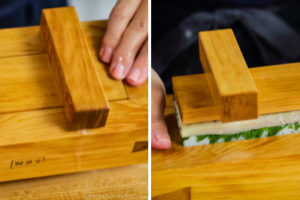
Place the top piece of the mold and use it to press down on the rice firmly.
Rotate 180 degrees and press down again firmly with your body weight.
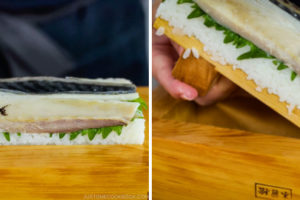
Flip the mold so the top piece is now at the bottom. Slide the sidewall of the mold down.
Remove the top piece. If the fish is stuck to the top piece, use a knife to detach. Push up the bottom piece through the sidewall.
The completed oshizushi is now on the bottom piece. Insert a knife to detach from the bottom piece.
Cut the oshizushi in half and cut each half into 3 pieces. Serve on a plate and garnish with pickled ginger. You can repeat for another piece of mackerel. Clean the mold and moisten before making the second batch. Alternatively, you can use plastic wrap to avoid cleaning every time.
Recipe by Namiko Chen of Just One Cookbook. All images and content on this site are copyright protected. Please do not use my images without my permission. If you’d like to share this recipe on your site, please re-write the recipe in your own words and link to this post as the original source. Thank you.
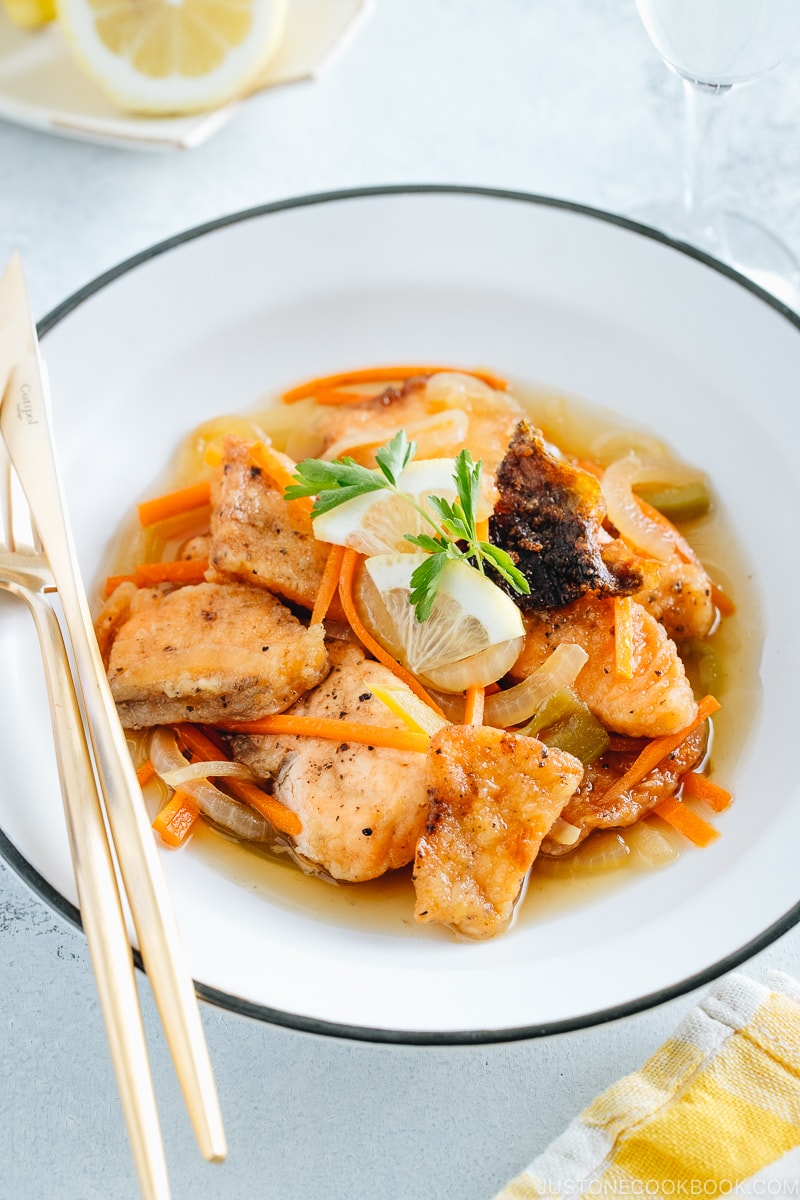
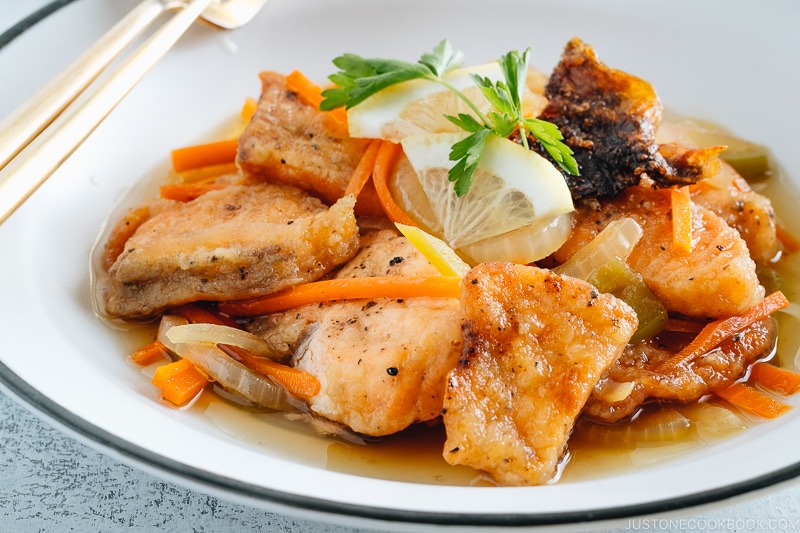
Marinated in soy dashi vinaigrette and served chilled, Salmon Nanbanzuke is a delightful seafood fare to enjoy in the summer. The unique preparation allows the salmon to store for days! You can serve it as an appetizer or a main dish. Just don’t forget to chill your favorite sparkling sake or white wine to go with.
When the weather is warm outside, I crave for a meal with a simple and refreshing taste and this Salmon Nanbanzuke (鮭の南蛮漬け) is easily one of my favorite seafood fares to enjoy.
Nanbanzuke may not be on your radar when comes to Japanese food, but it is actually a popular dish enjoyed both at home and restaurants in Japan. Here, the salmon is first deep-fried and marinated in a tangy sauce along with colorful julienned vegetables. The mixture is then chilled in the refrigerator and served cold. The result is light and incredibly appetizing.
What is Nanbanzuke?
Nanban (南蛮) literary means “southern barbarian(s)” in Chinese-based Japanese words (or kango 漢語 – Chinese loanwords in the Japanese language), originally referring to the people of South Asia and Southeast Asia. In Japan, it was used for the Portuguese, who first arrived in 1543, and later other Europeans who came to visit around the 16th to 17th century.
The word “nanban” also referred to something foreign and exotic, such as nanban kashi (南蛮菓子, foreign sweets) like Catella, or food with exotic spices, marinades, and sauces like nanbanzuke, as in -zuke meaning “being soaked”.
If by any chance you are familiar with Escabeche – a fried fish dish that’s marinaded in a vinegar-based sauce in the Mediterranean and Latin American cuisines – Nanbanzuke is essentially the Japanese interpretation of that. Instead of cider vinegar and spices, we enliven the fish or meat with the concoction of the Japanese pantry such as dashi, mirin, and sake. The unique preparation ultimately helps conserve the dish that it can last for days in the refrigerator.
Besides salmon, you can also make nanbanzuke with these popular ingredients:
Aji (horse mackerel)
Saba (mackerel)
Shishamo (shishamo smelt)
Wakasagi (Japanese pond smelt)
Chicken
3 Important Tips to Make Delicious Salmon Nanbanzuke
1. Coat the salmon with potato starch or flour.
This crucial step helps to seal in the umami and juice in the fish, and during the deep frying, it acts as a protective shield to prevent the flesh from breaking apart. If you don’t have potato starch, you can sub with corn starch or wheat flour, but don’t skip the coating.
Everyone has a slightly different level of acceptance when it comes to “sour” food. Before finalizing this recipe, I have tested different versions of Nanban Marinade with my family because each of them has an opinion of the comfort level of sourness. So, use my recipe as a guide. Have a taste and adjust the ratio until the vinaigrette tastes right to your liking.
Speaking of vinegar, most Japanese recipes use rice vinegar (米酢). It is milder in taste and not as “sour” as other kinds of vinegar. If you plan to make Sushi Rice (for making sushi), Cucumber Salad, and Japanese dressings, I highly recommend looking for rice vinegar.
For the summertime, I like to use a bit more vinegar for extra tanginess.
3. Marinate the fried salmon while it’s hot.
The most important technique for delicious Nanbanzuke is to marinate the fried salmon as soon as it’s out of the oil. Remove the excess oil by shaking it off and dunk the salmon into the marinade. The hot fried salmon absorbs the flavors most.
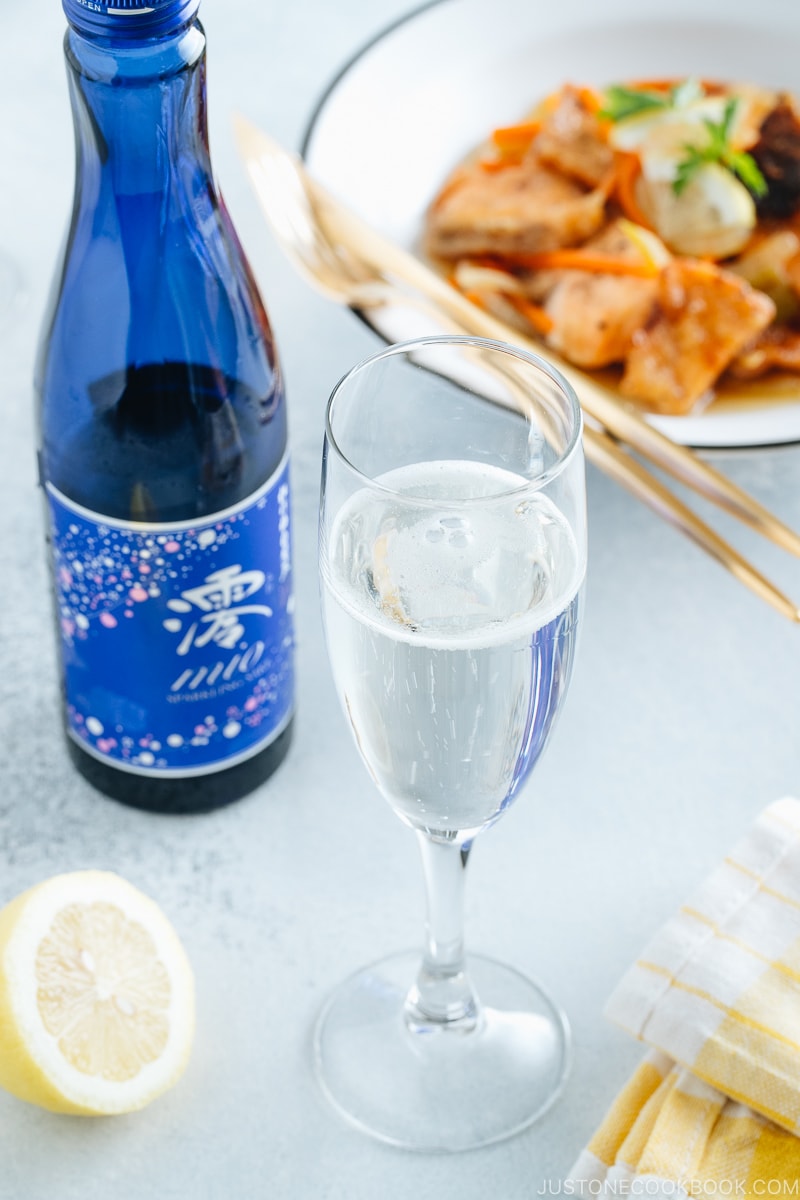
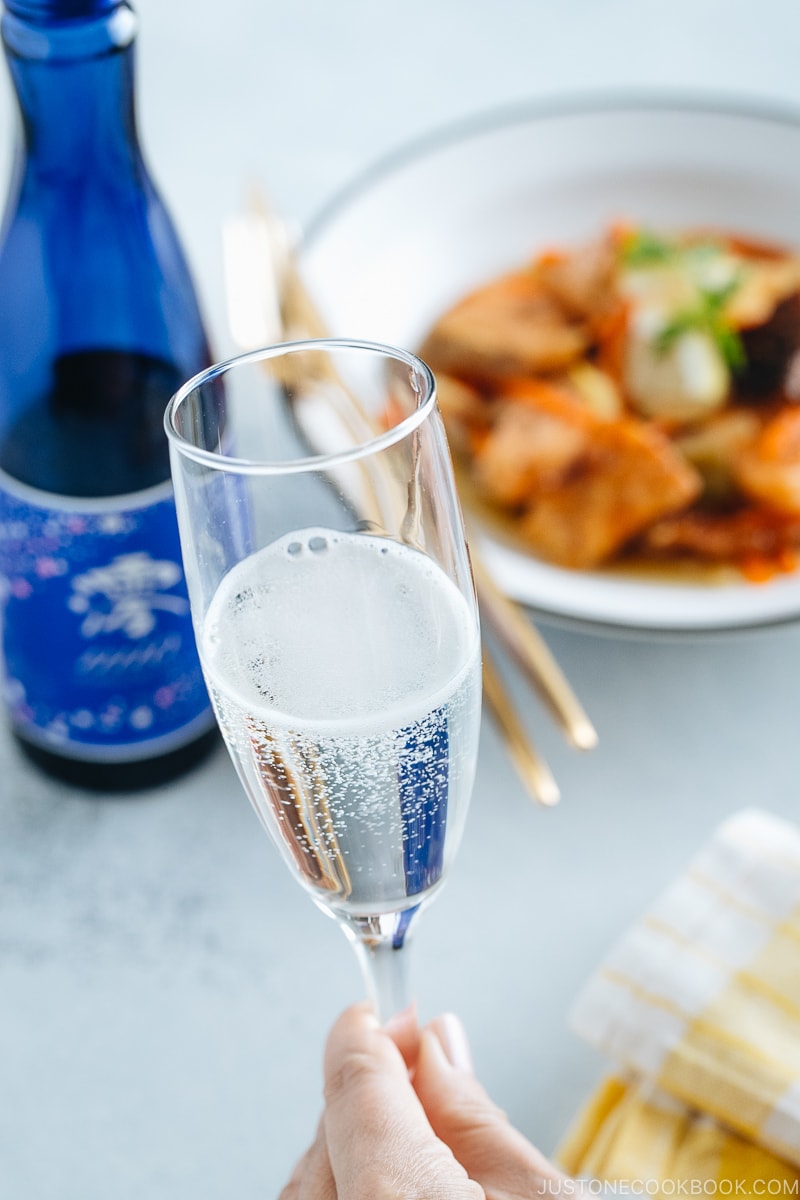
Pairing with Mio
For this Marinated Fried salmon with Vegetables, we paired it with Sho Chiku Bai Shirakabegura MIO Sparkling Sake. The sparkling sake is similar to a fruit cider, with flavors of apple, pear, and summer fruits.
The sweetness and fruitiness of the sake match the vinaigrette really well and the tiny bubbles clean the palate so you’re always ready for the next bite. We love this sparkling sake with summer meal like Salmon Nanbanzuke.
Cheers! I hope this easy salmon dish will be another favorite of yours!
2 Tbsp sake ((I used Sho Chiku Bai Classic Junmai Sake))
2 Tbsp mirin ((I used Takara Mirin))
Garnish (Optional)
lemon slices
parsley
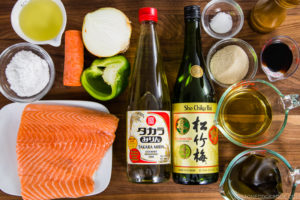
Gather all the ingredients.
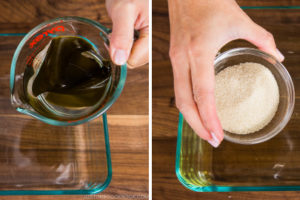
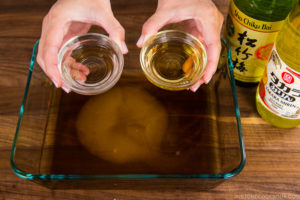
To Make Nanban Marinade
In a rectangular container with a lid, combine vinegar, dashi (remove kombu), soy sauce, and sugar.
Add sake and mirin.
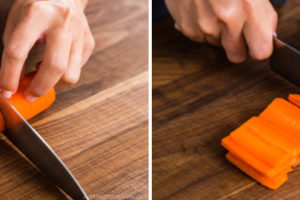
Cut the carrot into 2 inch pieces and slice into slabs.
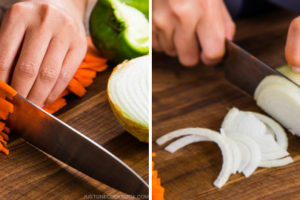
Then cut the slabs into julienne strips. Thinly slice the onion widthwise (to give texture and remain the shape after cooking).
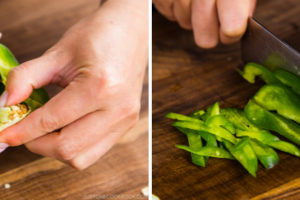
Remove the seeds from the green pepper and cut into julienne strips.
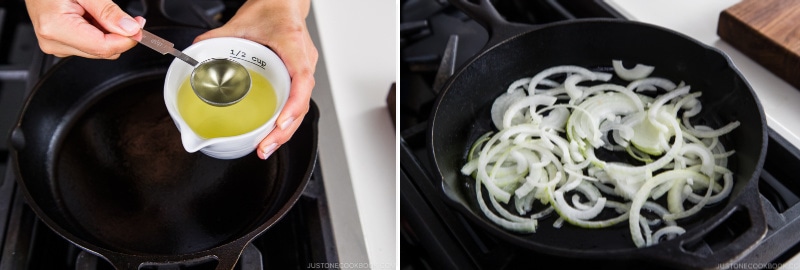
Heat a large frying pan and when it’s hot, add 1 Tbsp of oil from the ½ cup oil. Add the onion and saute.
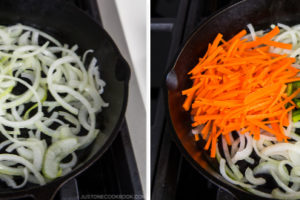
Once the onions are coated with oil, add the carrot and bell pepper.
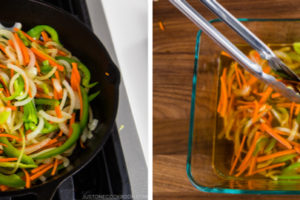
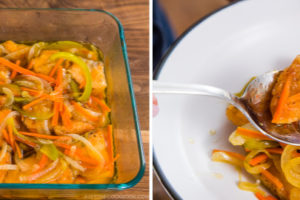
When the vegetables are coated with oil and wilted but still crisp (don’t overcook), transfer them to the marinade. Set aside.
To Prepare Salmon
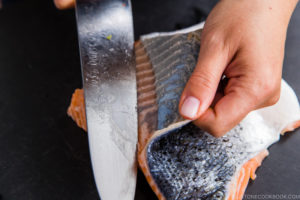
If your salmon has skin, you can easily remove it from the corner by holding the salmon with a knife in one hand and slowly pulling the skin on the other hand as you see below. Salmon skin is really delicious when it's cooked till crispy. I'll show you how to prepare below. For now, set aside on a plate, cover with plastic, and refrigerate.
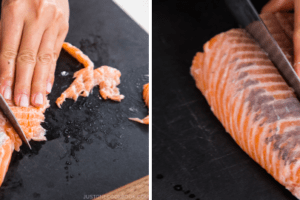
Once the skin is removed, cut the salmon into a few blocks.
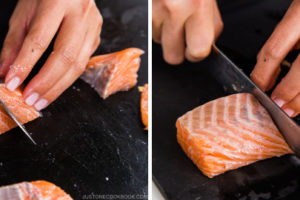
Then cut each block into bite size pieces, roughly ½ inch thickness.
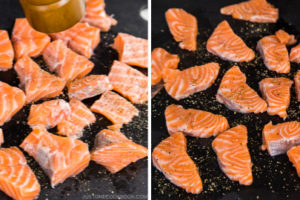
Season the salmon with pepper and salt.
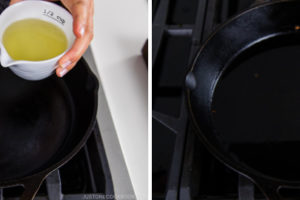
In the same frying pan, heat the rest of oil over medium heat.
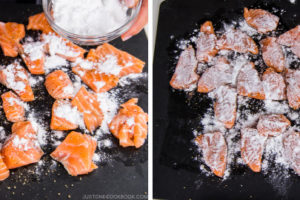
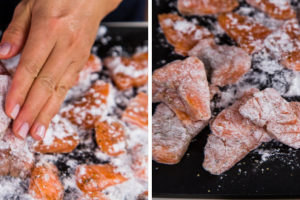
Sprinkle potato starch over the salmon and coat well.
Remove the excess starch.
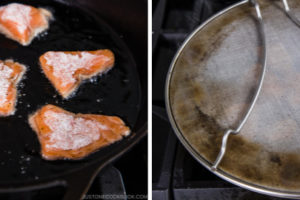
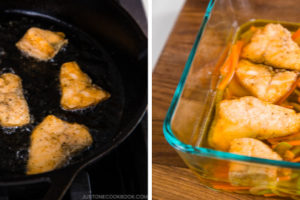
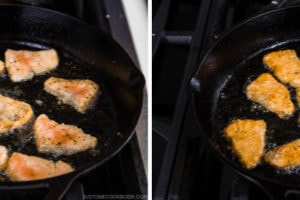
When the oil is hot, add the salmon in the pan (Do not crowd the pan as the oil temperature will drop too quickly). Fry until golden brown, about 5 minutes (depending on the thickness of the salmon). You can use this splatter screen to avoid oil splatter.
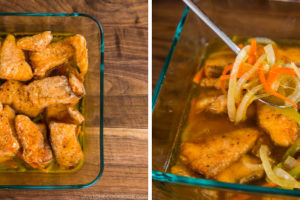
Once the salmon is cooked, shake off the oil well and transfer to the marinade while it’s hot.
Continue frying the rest of the salmon.
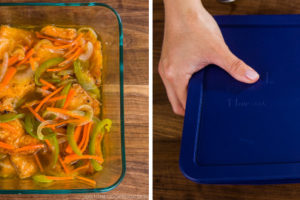
When you finish frying all the salmon, put the vegetables in the marinade over the salmon so it will be completely submerged in the marinade.
Cover the lid or plastic and refrigerate for at least 30 minutes, or preferably overnight.
To Serve
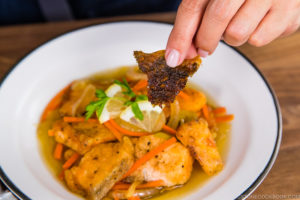
[Optional] Sprinkle salt on the salmon skin and bake at 325 ºF (160 ºC) in the oven or oven toaster for 30 minutes, or until it's crispy. The skin will cook in its own oil. Once it's crispy, break it into smaller pieces and use them as a decoration when serving.
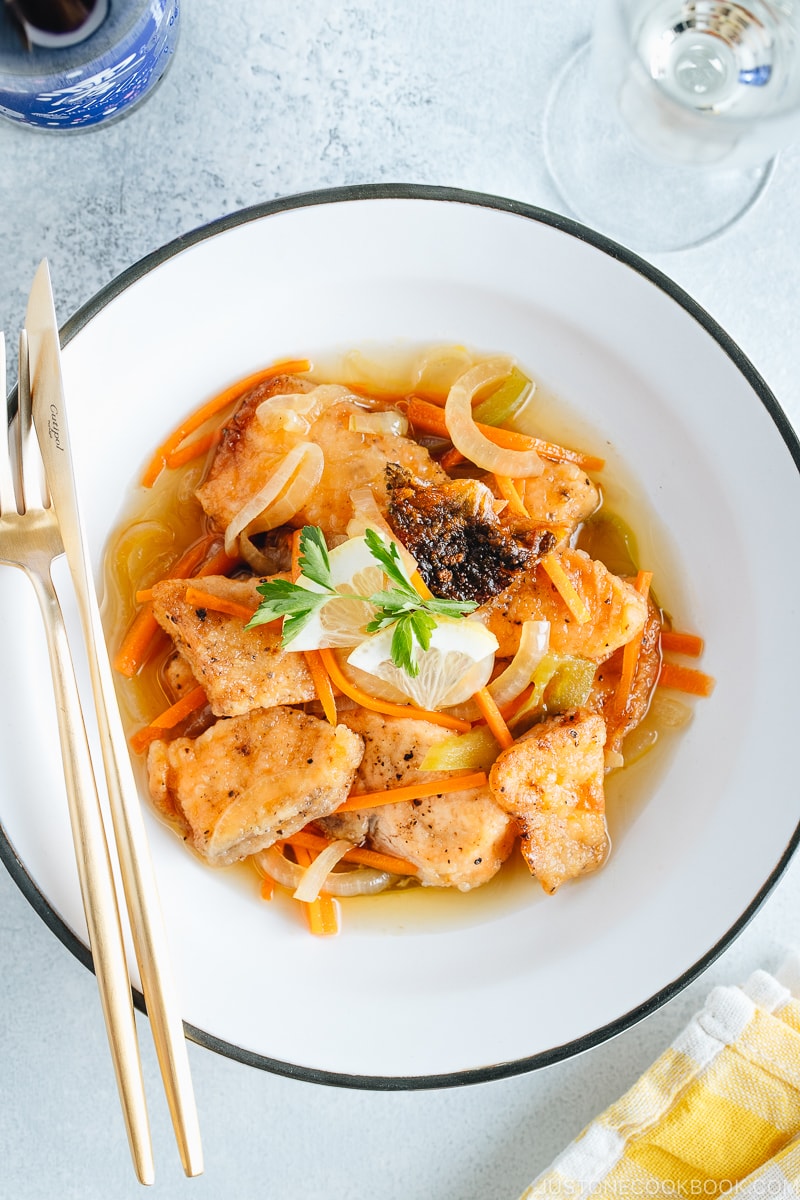
Serve the vegetables from the marinade on a plate and top with salmon.
Garnish with sliced lemon, parsley, and baked salmon skin. Serve it chilled.
To Store
You can keep the dish in the refrigerator for up to 5-6 days.
Recipe by Namiko Chen of Just One Cookbook. All images and content on this site are copyright protected. Please do not use my images without my permission. If you’d like to share this recipe on your site, please re-write the recipe and link to this post as the original source. Thank you.